David Nield in The Guardian
Mark Zuckerberg has a gargantuan social network. If you add up the number of accounts from the services he owns – Facebook, WhatsApp, Messenger and Instagram – you get a figure of 3.5bn, which is roughly half the world’s population. Granted many people will have multiple accounts and belong to multiple services, but still, that’s a lot of pokes, likes and cat gifs. Especially impressive given the scepticism and the love-hate relationship many have with his empire, particularly the Facebook mothership – or Dark Star, depending on your point of view. Being part of modern society without being involved somehow with the Zuck is increasingly tricky: instant messaging is hard without going via Facebook’s servers; you’ll need Instagram if you want to show off your perfectly arranged avocados and children’s fancy-dress outfits to the world; and if you want to date, no Facebook means no Tinder. Even if you’re one of those refuseniks who proudly claim “I’m not on Facebook”, you probably are – what about that chemically inconvenienced stag weekend in Tallinn that your pals created a Facebook album for? Yes, you’ll have to join to find out.
It’s a Faustian pact: in return for these sometimes useful services we give up our privacy and allow Facebook to mine our lives for data to sell to advertisers – but it’s a deal we can finesse a little to reclaim a bit of our dignity. Here are some suggestions how…
1 Hide your Facebook profile from search engines
If someone should Google (or Bing) your name, the chances are your Facebook profile might be one of the first entries to appear in the list of results. If you would rather this didn’t happen, head into the account settings pages of the Facebook app and choose Privacy. The final option, “Do you want search engines outside of Facebook to link to your profile?”, can be disabled with a couple of taps. Note that it may take some time before you disappear from search engine results, and you can still be found in a search inside Facebook.
2 Prevent Facebook from tracking you outside Facebook
Facebook’s technology stretches well beyond Facebook itself, as you will know if you have ever logged into a different site or app using your Facebook credentials. As a result, you might see hotel ads on Facebook if you spend a lot of time on hotel websites. If you’d rather this didn’t happen, go to ads in account settings, select “Can you see online interest-based adverts from Facebook?”, then turn it off. You will still be shown the same number of ads on the social network, but they won’t be based on the browsing you do on non-Facebook sites.
Facebook’s technology stretches well beyond Facebook itself, as you will know if you have ever logged into a different site or app using your Facebook credentials. As a result, you might see hotel ads on Facebook if you spend a lot of time on hotel websites. If you’d rather this didn’t happen, go to ads in account settings, select “Can you see online interest-based adverts from Facebook?”, then turn it off. You will still be shown the same number of ads on the social network, but they won’t be based on the browsing you do on non-Facebook sites.
3 Stop Facebook using your likes in ads
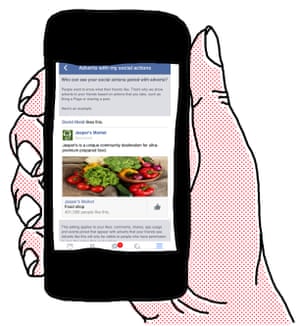
You’ve probably seen ads in your newsfeed related to something that one of your friends has liked. If you don’t want your own likes to be exploited in this way, open up the account settings page, tap the ads button, and choose “Who can see your social actions paired with ads?”. By changing the bottom value to No one, you can make sure your Facebook contacts don’t see ads linked to your likes – although they can still be used to influence the ads you see in your own feed.
4 Stop people tagging you
If one of your friends wants to upload an embarrassing photo of you, there’s not much you can do except beg them not to; but you can prevent the picture (or any type of post, from updates to locations) being tagged with your name. From the Facebook apps menu, choose settings menu, settings and timeline and tagging: this screen lets you enable a post-review feature, so that you can block or approve all tags before they’re applied. There are a number of other tag-related settings to play around with on the same screen, too.

5 Disconnect third-party apps
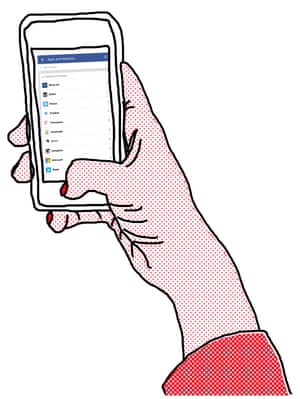
You’ve probably logged into various apps and services using Facebook but you don’t want to give these third-party developers permanent access to your account. Head to account settings and apps, inside the mobile apps you can change the permissions of these external apps and even kick them out altogether – ideally you want to boot out any that you’re not using on a regular basis (you can always add them again later). The fewer connections you have, the safer and more private your account.
YouTube content might not be fit for viewing at your desk and the ads are probably irritating
6 Stop Facebook automatically playing videos
Your timeline can resemble a cascade of YouTube spam and irrelevant video ads – the latter are important to Facebook as they are a major revenue earner. The YouTube content might not be fit for viewing at your desk and the ads are probably irritating, so you may want to turn the auto-play feature off. Here’s how: from your browser select settings, video, and at auto-play videos, hit the off button. Within theiOS app you take the same route and select “never” for auto‑play video.
7 Mute conversations in Messenger
For particularly busy conversation threads inside the Facebook Messenger app, you may not want to see or hear alerts every time there is a new message – that’s where the mute feature comes in. On Android, tap the info button (top right) inside a conversation and choose notifications to mute alerts for a certain period – anything from 15 minutes to indefinitely. On iOS, tap the title of the conversation rather than the info button. Messages will still come through, but you won’t get any notifications to that effect on your device until they’re enabled again.
8 Block other WhatsApp Users
Unfortunately, there’s always the chance not everyone you chat to has nice things to say, but WhatsApp includes a contact-blocking feature that’s fast and efficient. Blocked contacts can’t send you messages or calls, can’t see when you’ve been online, and can’t see your status or WhatsApp avatar picture. Go to the app menu, choose settings, account, privacy and then select Blocked contacts (Android) or Blocked (iOS): the subsequent screen lets you block and unblock contacts as required. You can also quickly block contacts from inside individual conversation windows by opening up the chat menu.

FacebookTwitterPinterest
9 Keep your location to yourself in Instagram
Be wary of adding location information to your Instagram photos, especially if your feed is public and for areas near your home or place of work. If you go to your profile page and tap the location pin, you can see which of your images are linked to a location – to remove the geotag, tap the menu button (on Android), choose edit and tap the photos or groups of photos you want to remove. Remember Instagram also allows you to share pictures (geotagged or otherwise) in private one-to-one conversations rather than your main feed.
Be wary of adding location information to your Instagram photos, especially if your feed is public and for areas near your home or place of work. If you go to your profile page and tap the location pin, you can see which of your images are linked to a location – to remove the geotag, tap the menu button (on Android), choose edit and tap the photos or groups of photos you want to remove. Remember Instagram also allows you to share pictures (geotagged or otherwise) in private one-to-one conversations rather than your main feed.
10 Prevent contacts seeing when you read their WhatsApp messages
Head to the main settings page inside WhatsApp to the read receipts option – if you untick this setting, people won’t know whether you’ve read their most recent messages. However, the function will be disabled in the other direction, too, so you’ll no longer get any indication whether your messages have been received (those two blue ticks that usually appear after posts). The last seen update (which shows your contacts when you last had the app open) works in the same way and can also be disabled.
11 Enable two-step verification
This is probably the wisest security precaution you can take to prevent your account being hacked. With this feature enabled, each time you or someone else attempts to log into your account from a new computer or device, Facebook will text you a code – which you will need in order to finish the process. Find this feature on the drop-down menu top right: settings, security, login approvals and check the box: “Require a security code to check my account from unknown browsers”.
12 Download all your data
While this isn’t a security measure in itself, downloading all the data that Facebook holds about you is an eye-opening exercise. Go to settings and click on the link “Download a copy of your Facebook data” at the bottom of the page. Once you’ve unstuffed the zip file, you’ll be able to see everything. This includes every message you’ve ever sent or received but not deleted (ie still plenty you’d rather forget); every time you’ve clicked on an ad; every survey you’ve completed; every photo you’ve uploaded; IP addresses you’ve used logging into Facebook (and the locations Facebook infers); the ads they think you’re interested in; and everyone one you’ve ever poked (stop sniggering). You might describe it as surveillance.
13 Choose who can see your posts
Whenever you update your Facebook status through the mobile apps (or indeed anywhere else) you’ll see an audience selector box that most likely has “friends” selected. Tap this to choose who exactly can see your next post: you might want to restrict it to family members, work colleagues, or an even smaller group of people (you can specify contacts one by one if necessary). This is where friend lists come in handy – Facebook makes some for you automatically (close friends and acquaintances for example), but you can create your own through the desktop Facebook site.
14 Delete your account?
If downloading your data freaks you out, the only way to remove it from Facebook’s servers is to delete your account. It takes Facebook up to 90 days to scrub you from their data banks, but be aware that items such as messages you’ve sent and friends’ photos you appear in will remain. The bonus of this tactic is that you’ll never be able to use Tinder again.
15 Deactivate your account
If deleting your account seems too drastic, too cold turkey, you could choose a trial separation from Mark Zuckerberg. Maybe you need a little space to think things through, see if you can survive without the emojis. Deactivation hides your timeline and means aunties, exes, criminals etc won’t be able to find you from a Facebook search. It also requires an iron will – your account will be reactivated any time you log back in – so stay away from the wine. You may also accidentally reactivate your account when you use your Facebook details to log into another site such as Airbnb. Therefore it would be wise to disconnect third-party apps (see above) before deactivating. Another precaution would be to change your password prior to deactivation, which would disrupt any saved logins you have scattered around your devices.

